BROWSE SERVICESBROWSE SERVICES
BROWSE SERVICESBROWSE SERVICES
In this article we are going to show you from start to finish how to install and then setup the WP-Optimize plugin for WordPress. This is one of plugins we recommend for improving your websites performance. The main cache functions within the plugin can be used for free!
We use WP-Optimize for our website as it has lots of extra features as well as the caching.
WP-Optimize Cache is a revolutionary, all-in-one WordPress performance plugin that caches your site, cleans your database, compresses your images.
This simple, popular and highly effective tool has everything you need to keep your website fast and thoroughly optimized!
It is very easy to install WP-Optimize as it’s available on the plugin directory. Follow the steps below to install WP-Optimize.
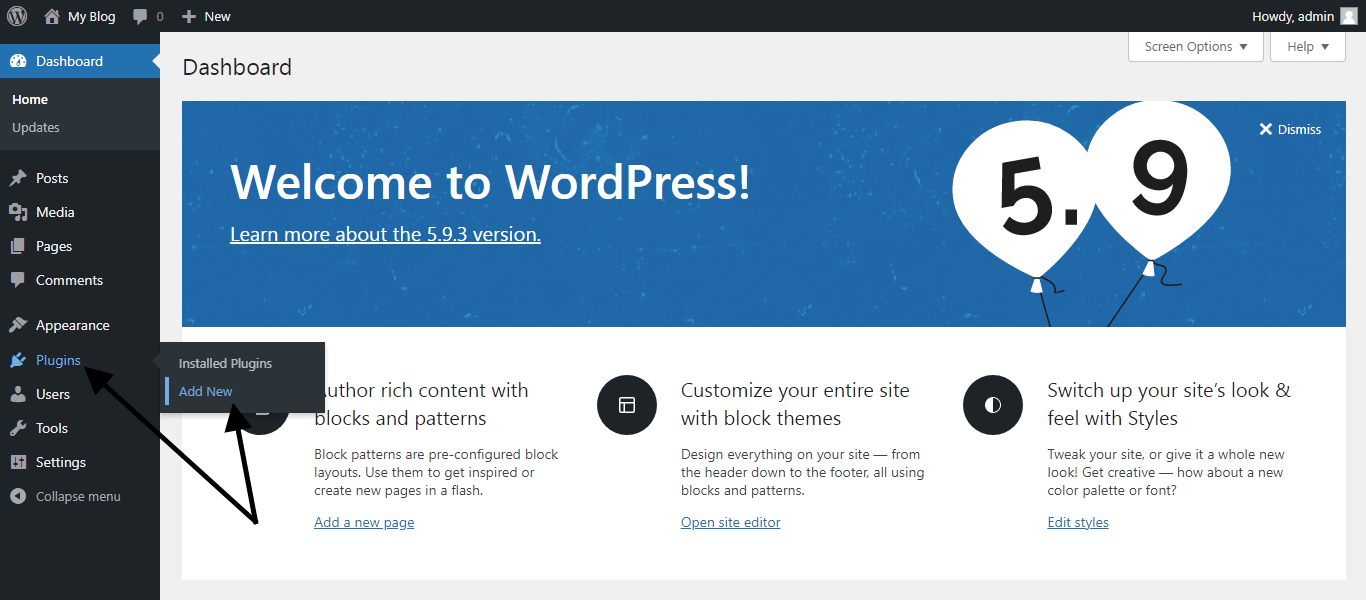
Step 1: Login to your WordPress admin area (dashboard) by going to yourdomain.com/wp-admin

Step 2: Hover over “Plugins” and click “Add New”.
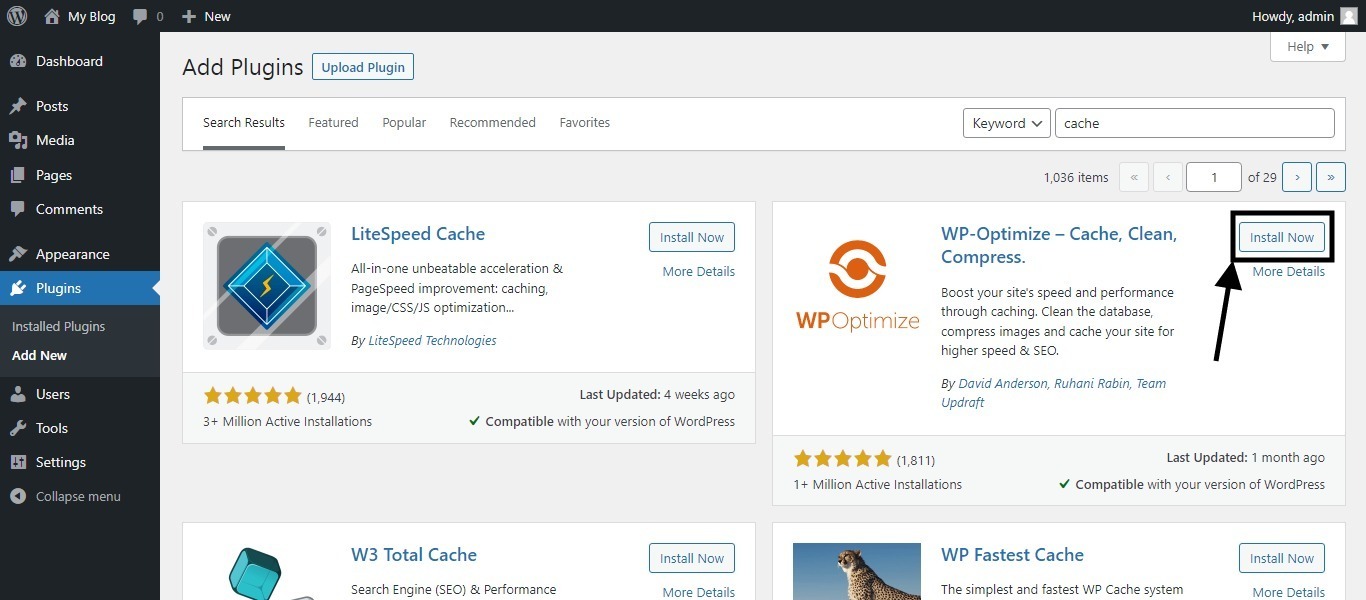
Step 3: Search for “cache” or “wp-optimize” in the search bar.

Step 4: Click “Install Now” and wait while it installs the plugin.
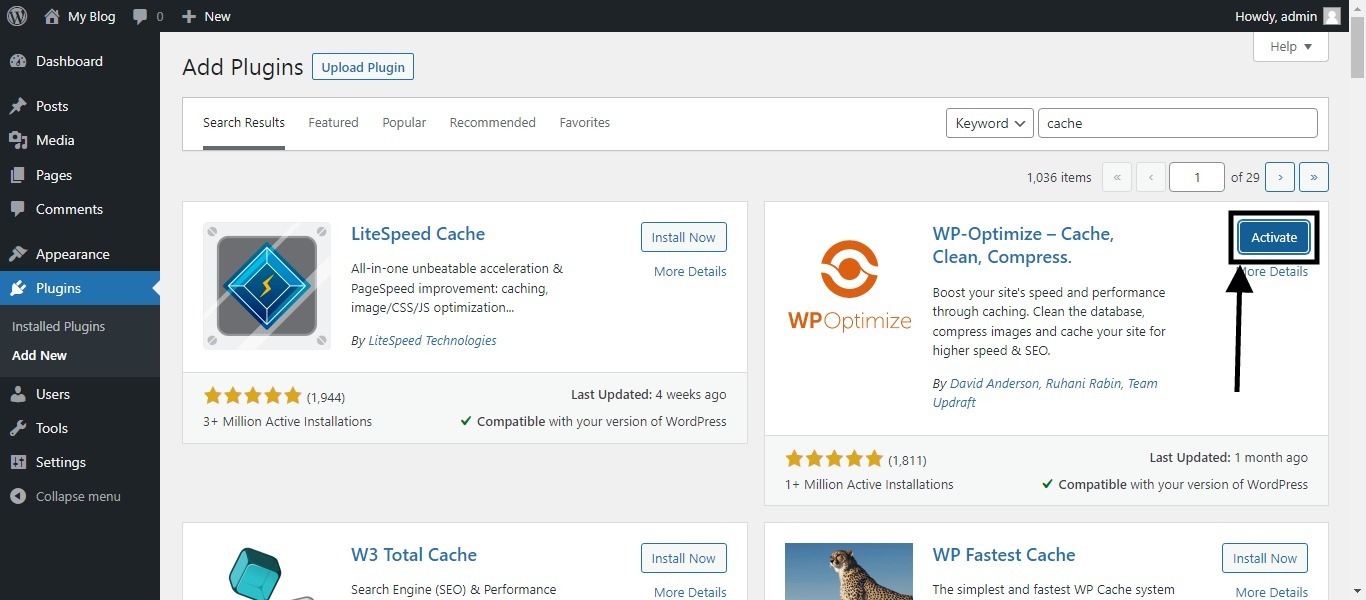
Step 5: Click “Activate” and the plugin will be ready to use.
We are now going to run through how to setup WP-Optimize and go through the settings. We won’t necessarily go through all settings. Any options selected are just our recommendations if you feel there are better options for your requirements please go with your own options.
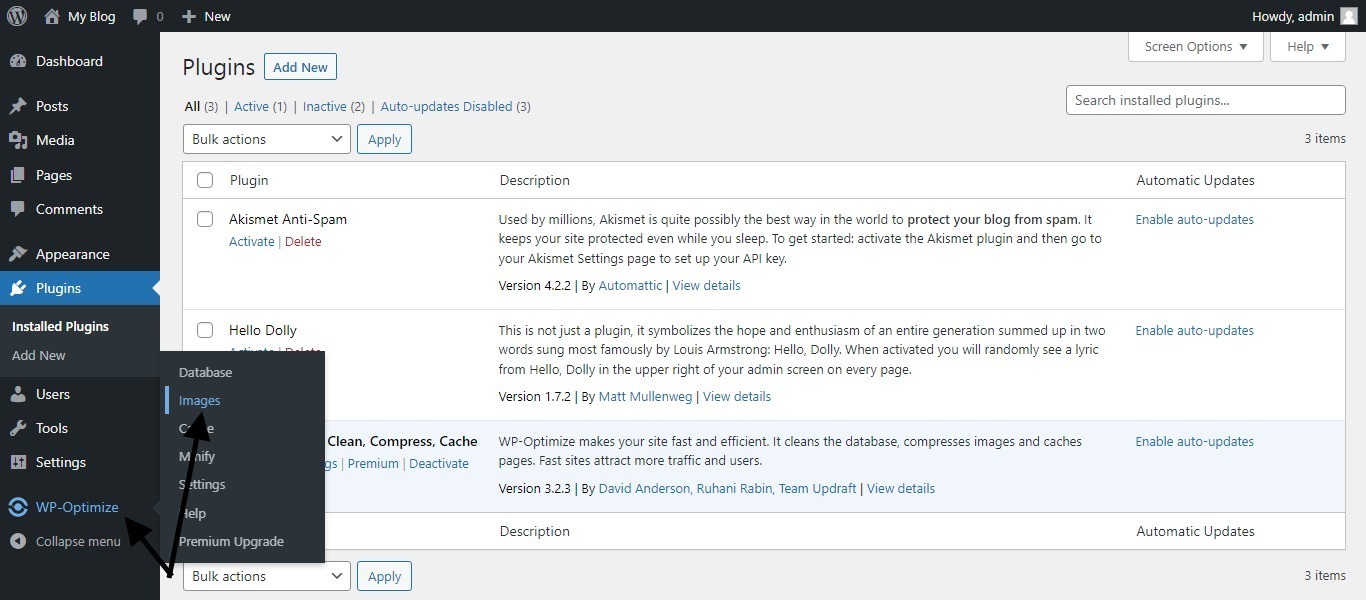
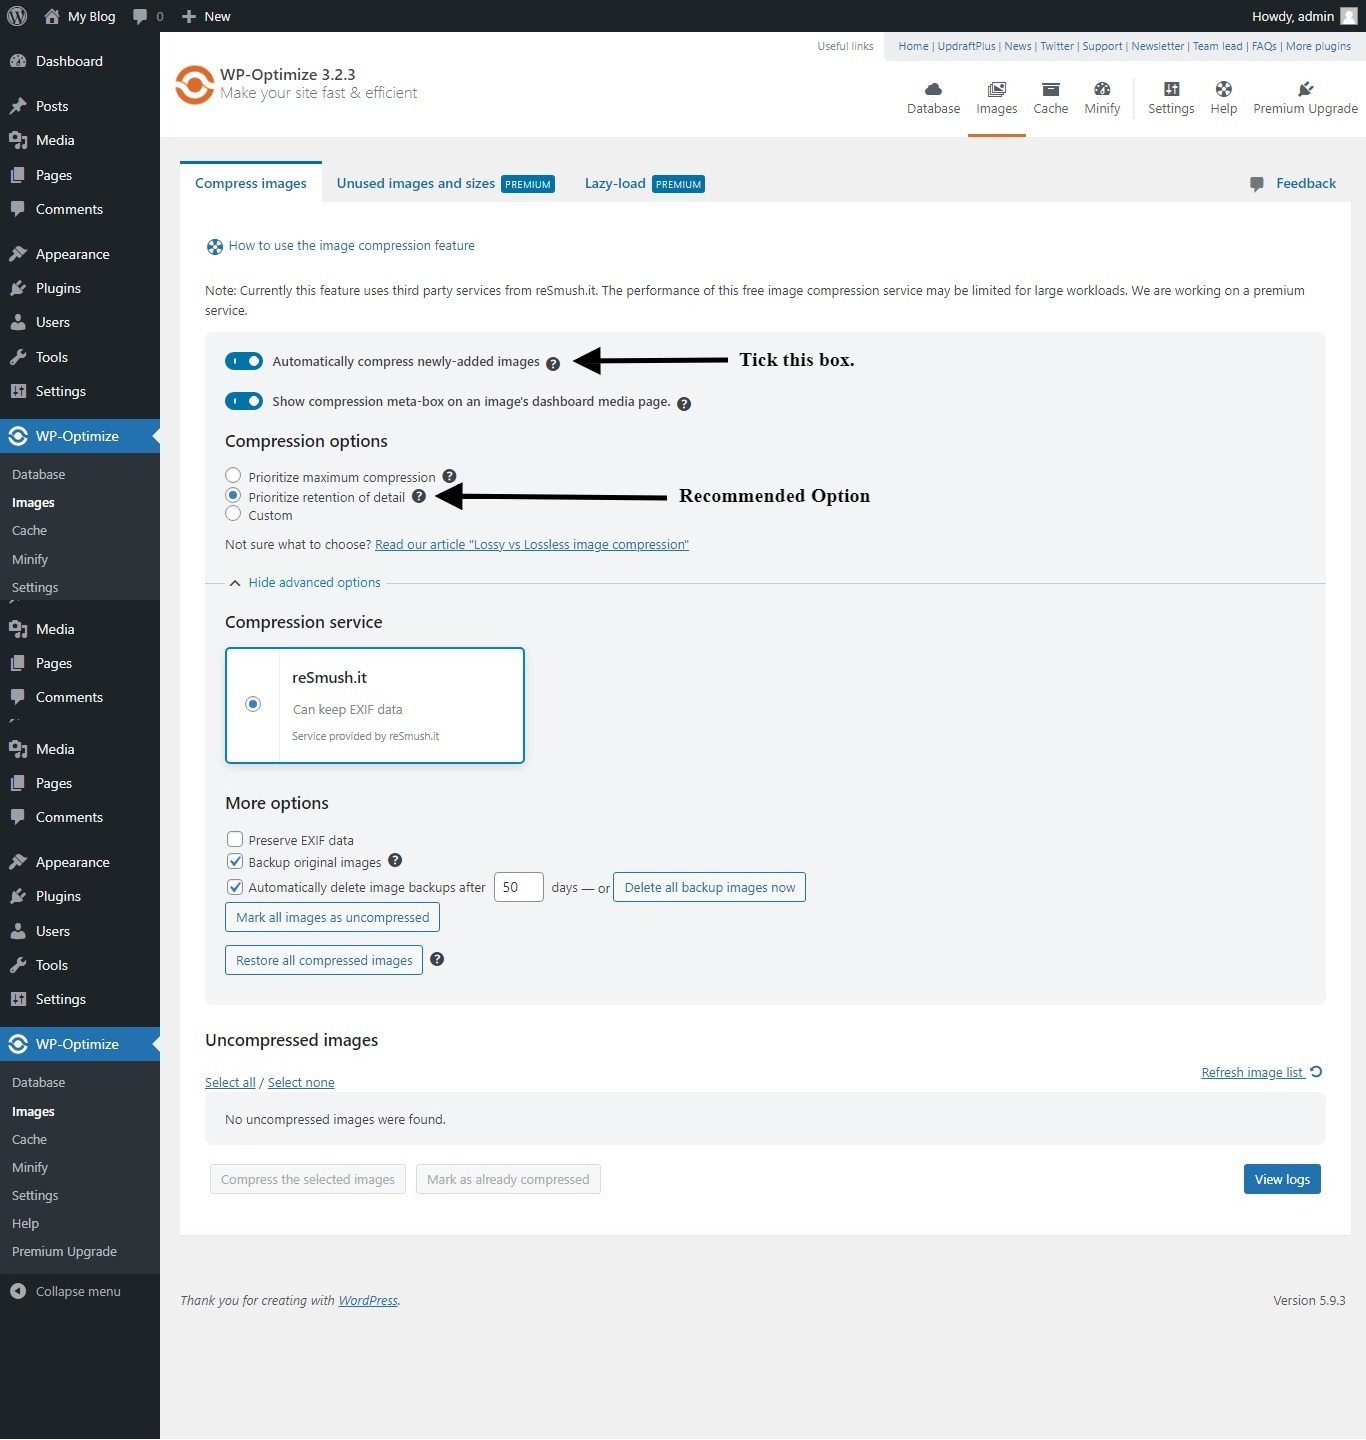
Step 1: Hover over “WP-Optimize” and click “Images”.
Step 2: 2.1: We recommend ticking the “Automatically compress newly-added images” box.2.2: Then ticking “Prioritize retention of detail” as this will keep the quality high but still compressed.
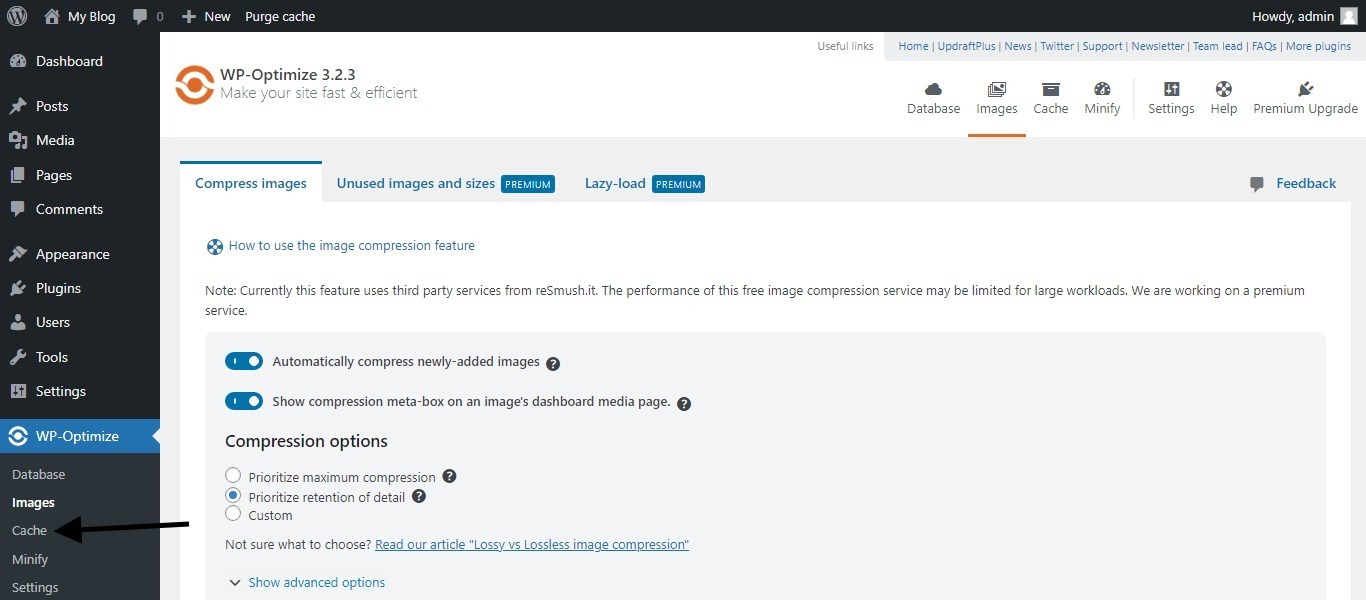
Step 3: Click “Cache” in the sidebar menu or in the header.
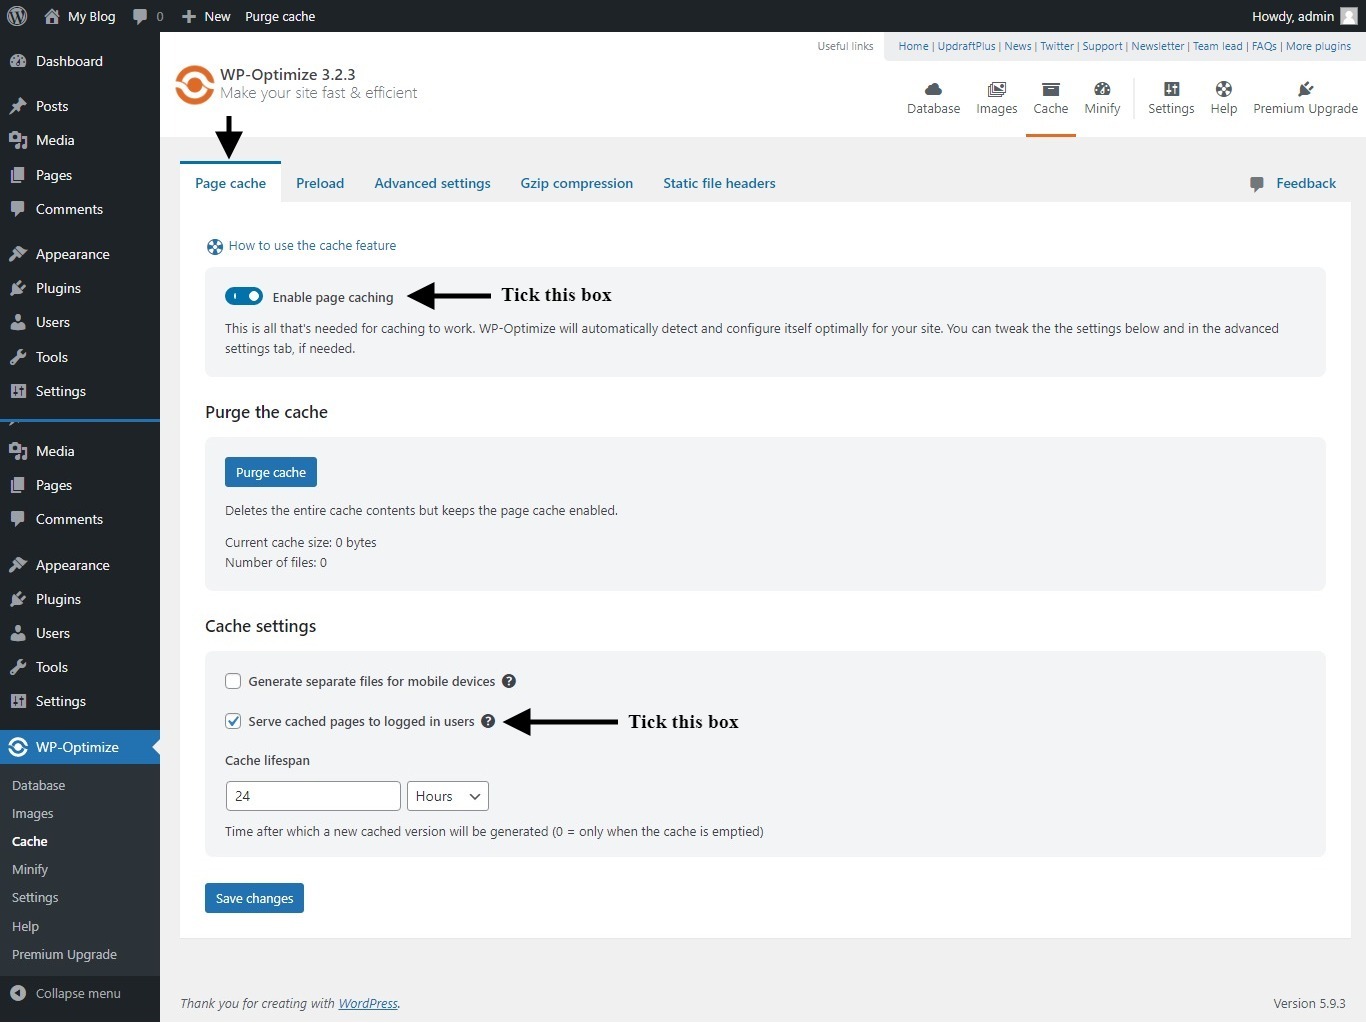
Step 4:
4.1: Tick to enable page caching.
4.2: Tick to enable page caching for logged in users.
4.3: Click “Save Changes”.
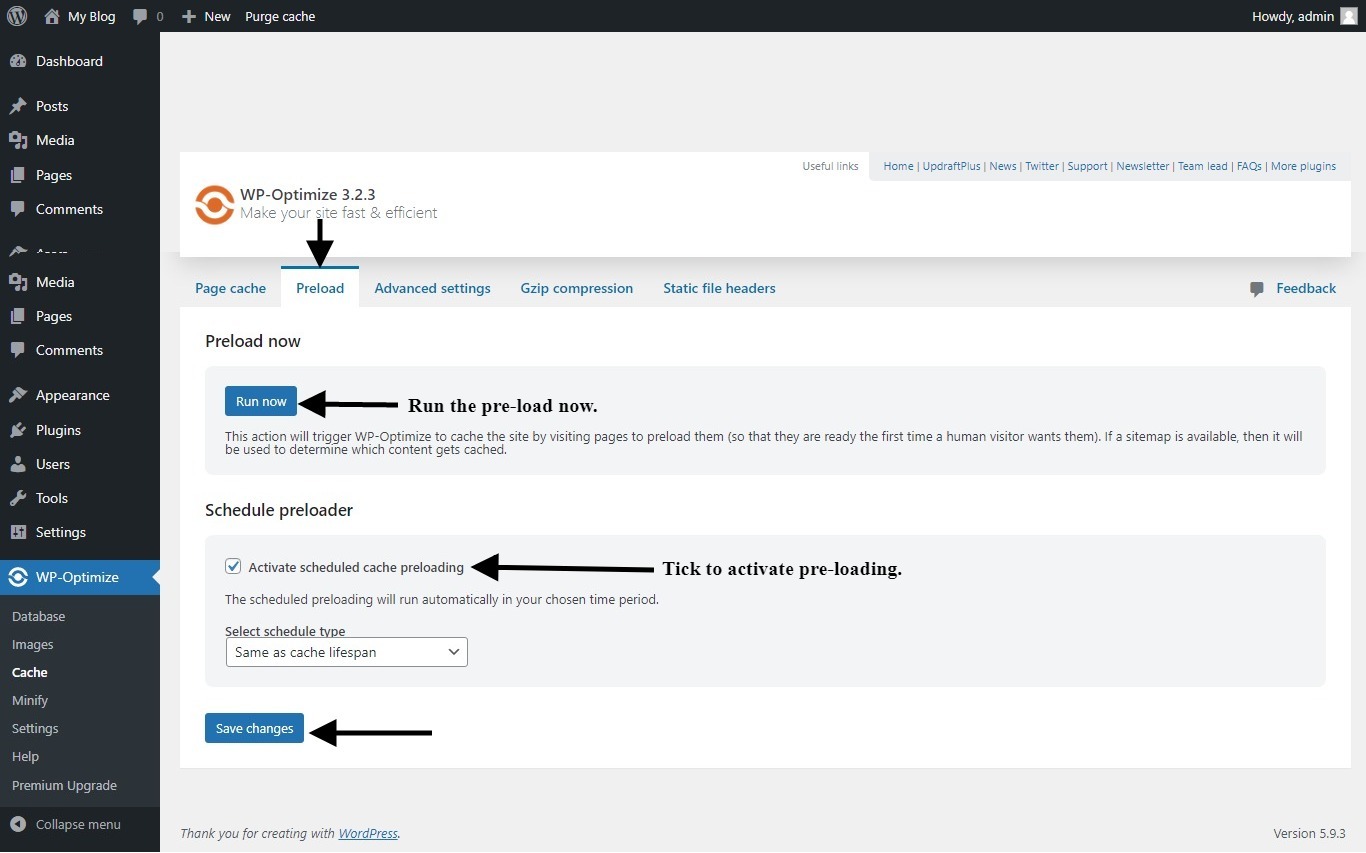
Step 5: Click “Preload” tabs of the top of the page.
5.1: Click “Run Now” to preload the pages now.
5.2: Click to activate scheduling.
5.3: Click “Save Changes”.
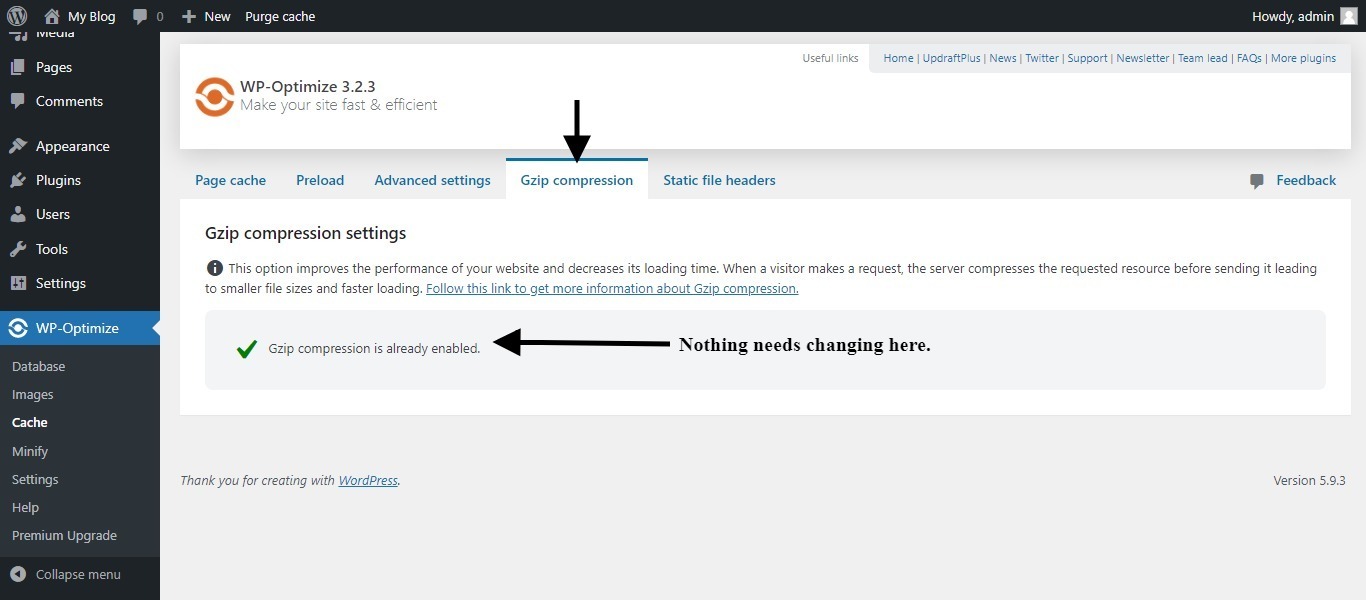
Step 6: Click “GZIP Compression” tabs of the top of the page.
This is just a quick check, you should go to this page and see GZIP is already enabled.
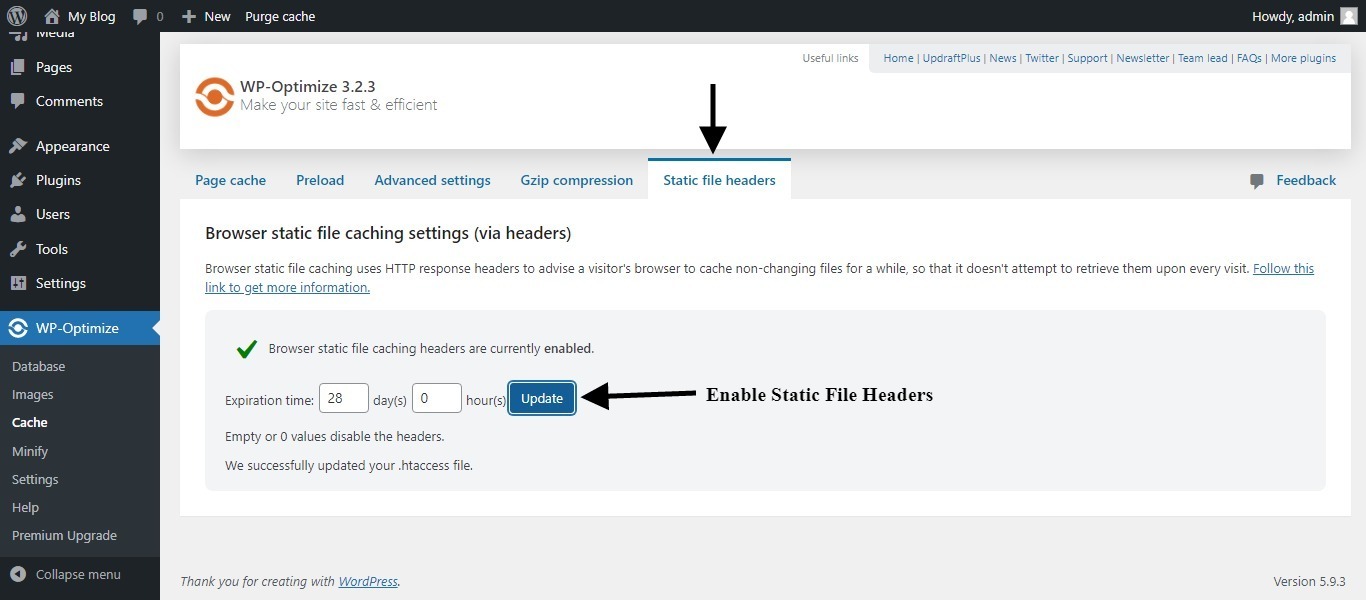
Step 7: Click “Static File Headers” tabs of the top of the page.
7.1: Click update to activate static file headers.
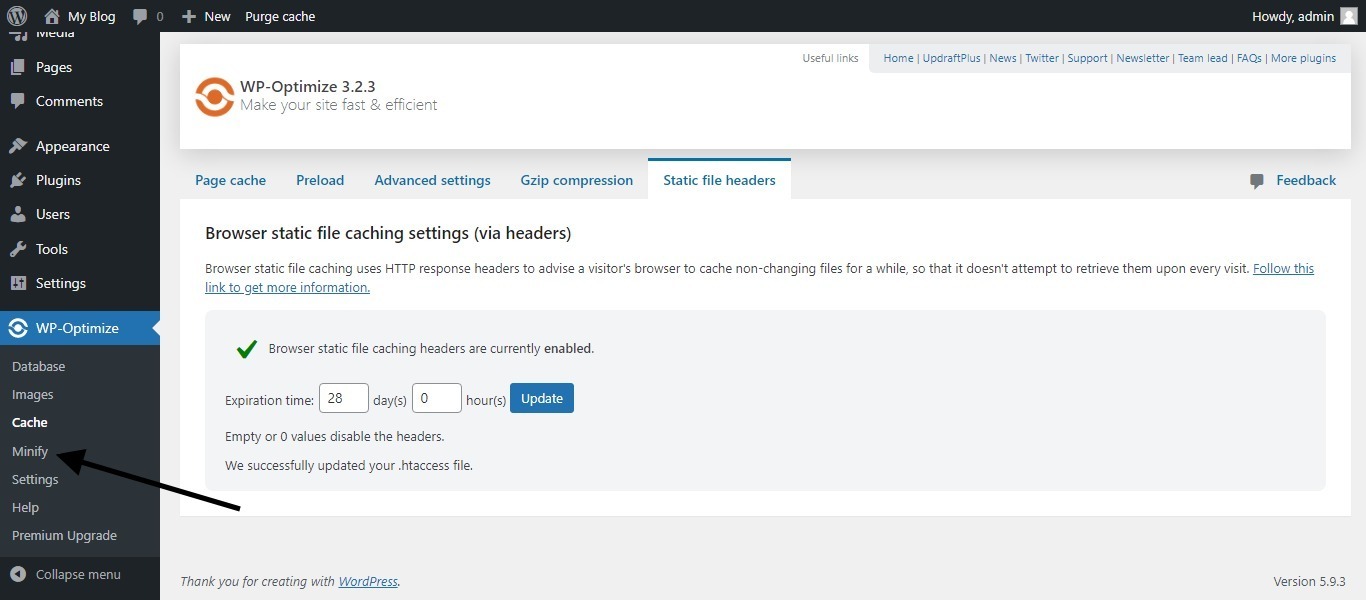
Step 8: Click “Minify” on the sidebar menu.
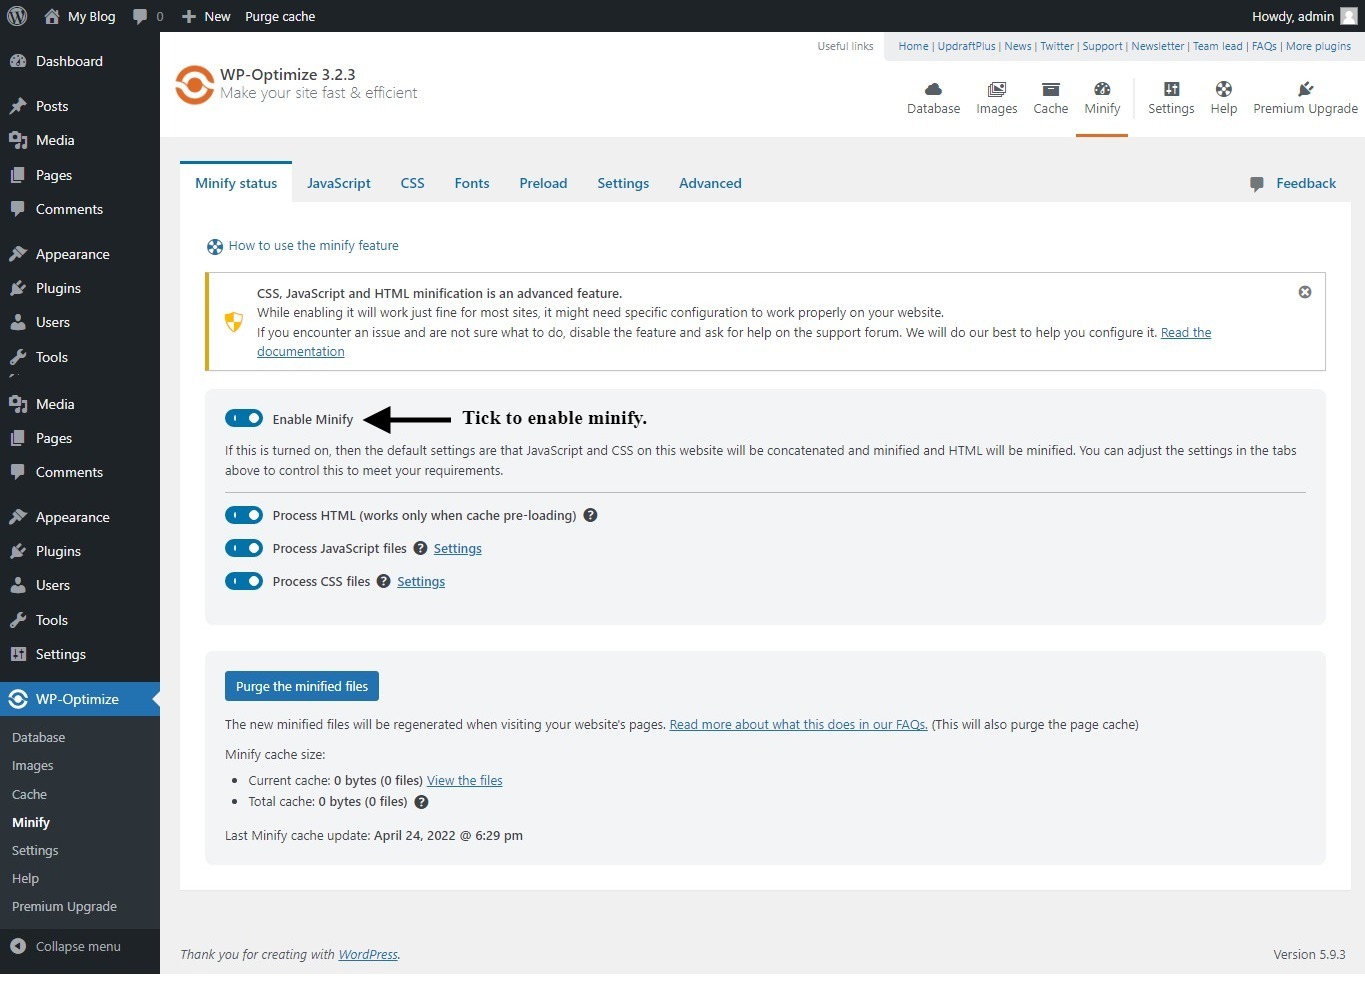
Step 9: Click to enable minify and then you can keep other options as they are.
Your website will now be cached and you have the extra performance benefits of image optimization, minifying and so much more.
We hope this article has been helpful and if you have any questions be sure to get in touch!