Our servers are extremely fast and can handle some of the best scripts & applications, many of the scripts are available on the instant script installer so you can start using them right away.
Wordpress is an easy to use CMS and allows you to make a professional website with thousands of themes & plugins.
OpenCart is a feature packed eCommerce script that makes it easy to start your online store. It's free with many themes & modules.
PrestaShop makes it easy to start your own online store. It's free with many themes and modules.
Joomla! is the mobile-ready and user-friendly way to build your website. Choose from thousands of features and designs.
In this article we are going to show you how to forward an email address from your Plesk control panel. Forwarding an email address allows your customers to send emails to your professional example@yourdomain.com and you will receive them wherever you specify. This is often used to forward emails to your personal @hotmail or @gmail email address.
1. Login to your Plesk: You can find your Plesk login details in the email we send you when you setup the account.
2. Find and Click “Mail” from the sidebar of your control panel.
3. Now click on the email address you want to setup the forward for.
4. Click on “Forwarding” from the top menu.
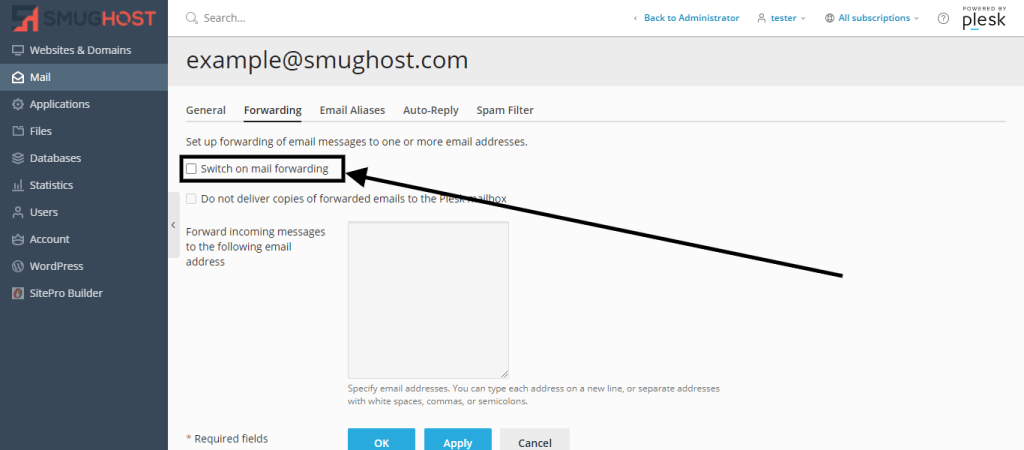
5. Click “Switch on mail forwarding”.
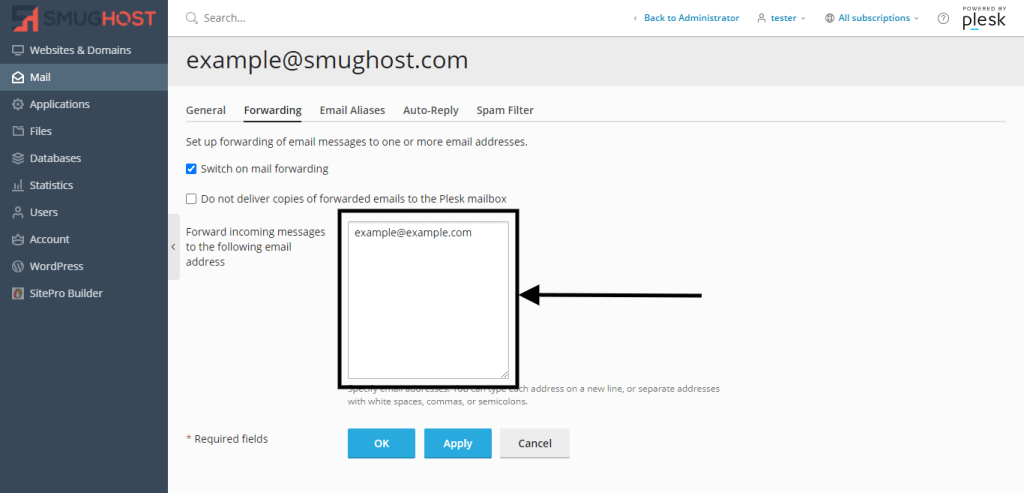
6. Now enter the email address you want to forward to emails to. You can enter multiple by adding one email per line.
7. Once finished click “Apply” and then “Ok”.
You have now setup the email forwarding for your email address, you can always add more later and when people email you on that address you will also receive it on the specified account.
Thank you for reading, We hope this has helped and if you have any questions or need help get in touch!